
I'm back in the shed.
I'm enjoying this build so much I couldn't stay away for very long.

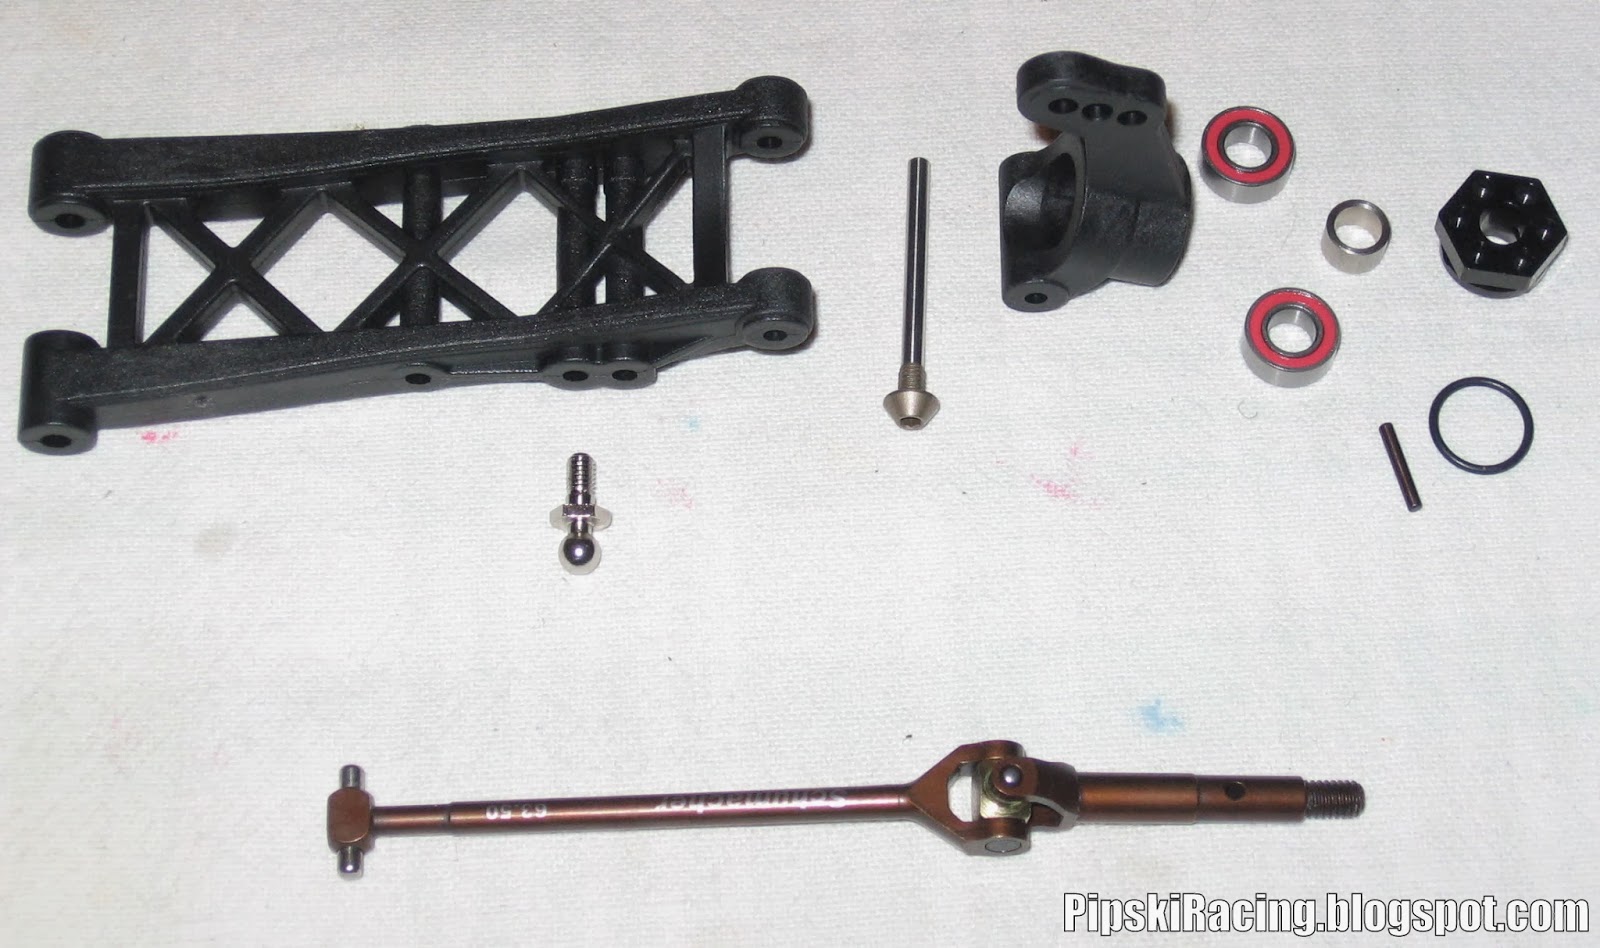
Starting at the rear end the time has come to start making this thing look like a car.
Having assembled the shock tower and wing mounts bolt them to the transmission housings.
These housings are the same as the K1 and although the kit items are plastic some tasty alloy option parts can be had, maybe Santa will bring me some?

More familiar parts here are the rear arms and very sturdy drive shafts straight out of the K1 parts bin.
A change worth noting here is the fact that Schuie are moving to 12mm hex drive on their hubs now and new kits like the KR, and now the KF, include alloy hexes.
This is a double edged sword as most Schumacher drivers will have a decent collection of obsolete wheels, on the other hand 12mm is a common fitment so a wide range of alternative wheels are now usable.
This is a double edged sword as most Schumacher drivers will have a decent collection of obsolete wheels, on the other hand 12mm is a common fitment so a wide range of alternative wheels are now usable.

The arm mounts are plastic but again alloy option parts are available, Schumacher do like an option part!

These plastic hangers are marked with letters, be sure to use the right part in the right place.

As I have now come to expect from Schumacher all this goes together very easily.

SV2 owners will recognise the front end although the new bulkheads are now claimed to be stronger, I'll probably be testing that claim quite regularly!

The steering runs on more of those red seal bearings and feels silky smooth.


I opted for the seemingly de rigeur Savox 1258 servo.
There is no servo saver and these servos are tough enough to stand up pretty well to my ham fisted transmitter fumbling.

Snuggles in nicely with no spacers required ...
I couldn't resist adding a little purple of my own by way of some cup washers.
I couldn't resist adding a little purple of my own by way of some cup washers.

The front end and top deck can now be fitted.
I've already ordered some gold cup washers for the top deck (and everywhere else). I quite like the stealth look but you can't beat a bit of bling.

Time to fit up the rest of the front end.

The arms look like the those on the SV2 but are in fact longer.
12mm hexes feature here as do kwik klips allowing height adjustment of the front hubs.


Again everything fits perfectly and goes together without fuss.

If you run on abrasive surfaces there is an optional front skid plate available, this should help protect that gorgeous carbon fibre chassis plate.

Nearly there, shocks next.

What you get is a nice set of 13mm big bore shocks with titanium nitride shafts.
The old blue rings have now been replaced with the slightly fatter red ones, these all but eliminate leakage but the trade off is a little more stiction.
It would have been nice if the vented shock caps had been included in the kit but alas they remain a £20 option part.
When building shocks I ...
Use a 3mm screw to cut a thread in the shock end, this will make fitting them to the shaft easier.
Use some green slime on the o-rings or bath them in shock oil before assembly to help avoid leaks.
Be patient when fitting the adjustment collars, apply some silicon oil to the threads to avoid cross threading.

All the shock parts are now black.
I use a dremel to make a small notch in the collars to help when making adjustments trackside.

Pop them on, there are several set up sheets in the manual courtesy of Tom Cockerill, pick one that's closest to your usual track and position them accordingly.


Supplied with the car are a pair of plastic side guards, these finish things off nicely and will help prevent the ingress of debris. These also include an integrated aerial mount.

So here it is.
The body shell is a cab forward design that looks purposeful. I know of at least one person who will be pleased to know that it does not come with a pre drilled aerial hole ;-)
I will be painting it up in PipskiRacing colours over the next couple of days and will post some pics.

I really enjoy building these cars so am always a little sad when I finish, this time is no exception.
This has been a great build, as I've come to expect from Schumacher all the parts were of good quality and went together really well, I cant wait to get it on track.
There is of course still work to be done, that being the installation of some electrickery.
Thanks for reading, pop back soon to see my install.(no pressure then!)
If you missed Part 1 you can find it HERE
Paint and electrics can be found HERE
No comments:
Post a Comment